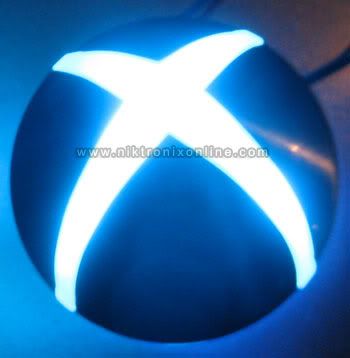
Xbox 360 controller LED mod Guide
This full guide will walk you through a classic Xbox 360 controller LED mod. We will focus on the guide button dome. To get the best results, you must follow the steps exactly. This is because there are many detailed calculations for the resistors.
First, you need to take apart your controller to get to the main board. If you are not sure how to do this, you can find a guide here: How to Open the Xbox 360 Controller.
Required Items for the Xbox 360 Mod
- 4 3mm LEDs of the same color
- Wire
- Solder
- Soldering Iron
- Hot Glue Gun
- Resistors (get the correct values)
- Transistor
- Dremel or something similar
Step 1: Preparing the Controller Dome
To begin, the next key step is to get the LEDs into the dome. This is the hardest part of the mod. Once you finish this step, the rest is much easier.
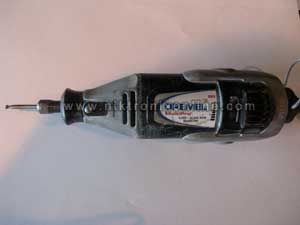
To fit the LEDs, you must first remove some plastic from inside the dome. We did this with a Dremel, as shown below.
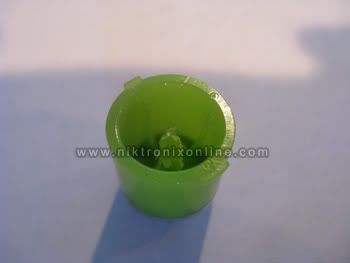
After you cut it, the dome piece should look like this. Make sure to leave the center post. This post is needed for the button to work when you press it.
Step 2: Assembling the Xbox 360 LED Cluster
Now it is time to wire the LEDs to fit in the dome. We found that using four 3mm LEDs will light it up well. It also gets rid of any bright 'hot spots'.
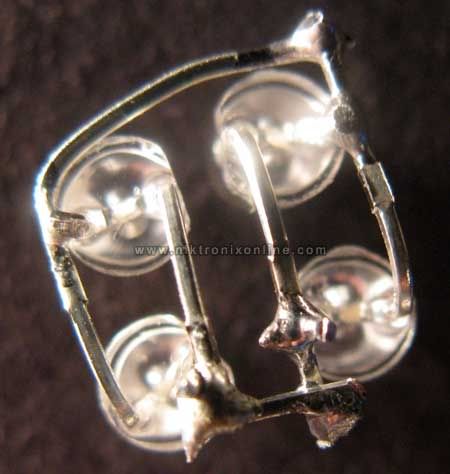
Before you start, look at this picture of the finished LED 'cluster'. Look closely at how small it is. This will help you make sure it fits in the dome when you are done.
Building the LED Assembly
First, take two LEDs and lay them side-by-side. Then, solder their negative legs together as shown.
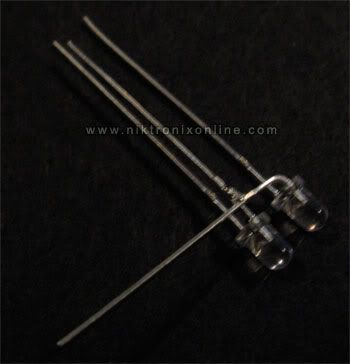
Next, bend the extra leg length up, just like in the picture.
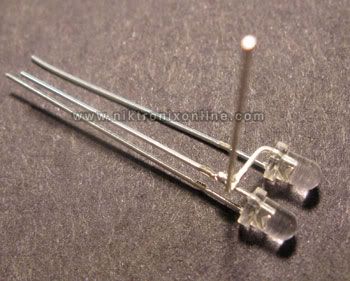
Now, do this again with your other two LEDs. Then, join the ground points on each set. The whole part should look like the image below. You will need to trim the extra material.
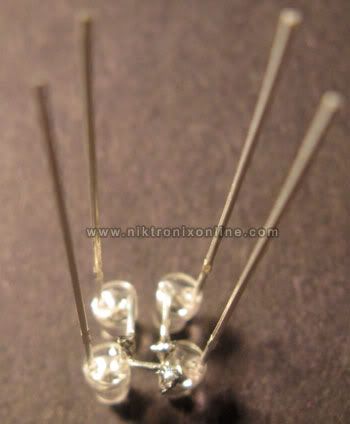
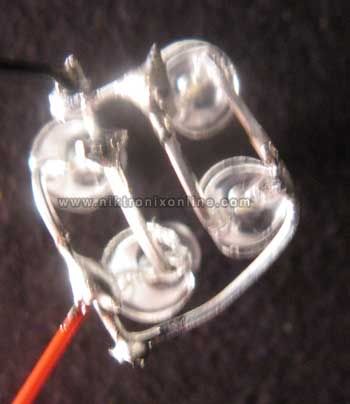
Then, connect all the positive legs on the outside of the cluster. Make sure the negative (-) and positive (+) parts do not touch. If they do, your LEDs will not work. It should now look like this:
Finally, you need to solder your positive (+) and negative (-) wires to the LEDs.
Step 3: Wiring your Xbox 360 Controller LEDs
Next, you need to place the LEDs into the dome. It may not fit perfectly. If so, use a little force. But do not use too much pressure, or they might break. You have spent a lot of time to get here, so be careful. When it is in, it should look like this:
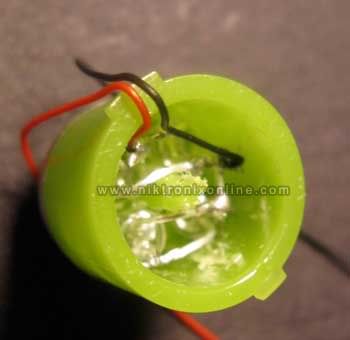
Now, solder the LEDs to the right power and ground spots on the controller. You must use the right resistors. If you do not, your LEDs will burn out. The voltage we use is from 3.15-3.5v. So, use this number to find the right resistor value.
Step 4 (Optional): Adding an Automatic On/Off Switch to your Xbox 360 Controller LED Mod
If you want a switch so the lights don't waste battery when the controller is off, keep reading this section.
Understanding the Transistor Switch
For this step, we will use a transistor as a switch. A voltage in the controller will tell the transistor to turn on or off. This lets power flow to the LEDs only when the controller is on. This is the basic idea for the switch.
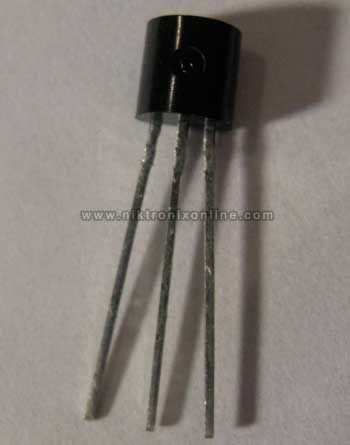
Below is a picture of the transistor we will use. Note the curved surface on the plastic part. It is facing you in the photo.
Soldering the Resistor and Transistor
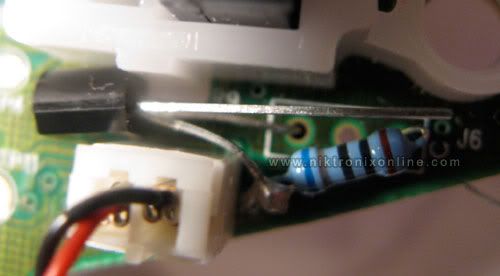
The next action is to solder a 180ohm (1/4w) resistor to this point. We solder it from the back side, as shown below.
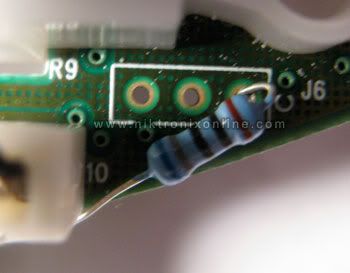
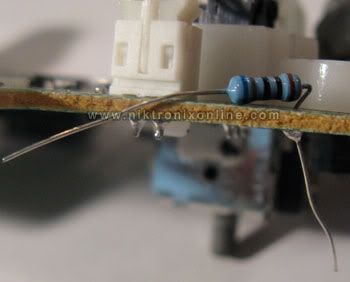
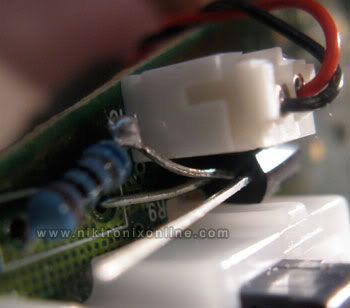
Next, you need to place the transistor as shown in the photo. It is very important to see which way the curved surface is facing. Put the 'bottom' leg through the first of the three holes. This hole is our ground. Then, solder the middle leg to the other end of the resistor. Make sure your setup looks just like the one shown.
Connecting Power and Ground
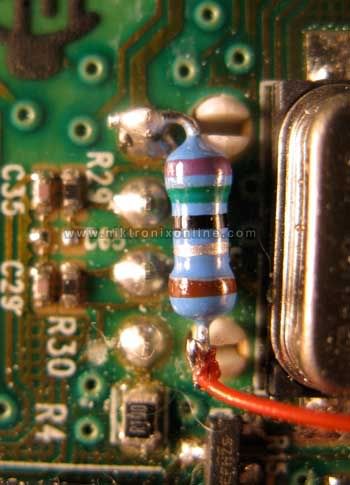
Once that is done, you will need to solder power to your LEDs. Solder the right resistor to this point. Then, solder your positive wire from your LEDs to the other end of that resistor. In the end, it should look like this:
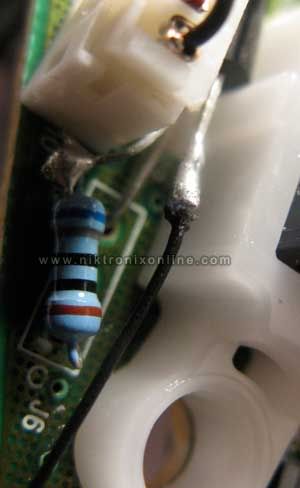
Finally, you just have to solder the negative wire from your LEDs to the last leg of the transistor. This is the leg that has not been used yet. This final link should look like the photo below.
Step 5: Your Xbox 360 Controller LED Mod is Finished!
Congratulations! You have now completed the Xbox 360 controller LED mod. The final step is to test it out and enjoy watching it light up!