How to Open an Xbox 360 (Phat Model)
How to open an Xbox 360 Phat console is a common question, and this guide explains the process. Opening the original Xbox 360 can be tricky because of its hidden clips and security screws. We will walk you through the entire process, from removing the faceplate to accessing the internal components. This is a necessary first step for many repairs and modifications.
Tools You Will Need to Open Your Xbox 360
Before you begin, you will need a few specific tools. Standard screwdrivers will not work on all the screws.
- Torx screwdrivers in sizes T8 and T10
- One small, flat-head screwdriver or a thin plastic wedge
- A pair of pliers (optional, but can be helpful)
- An Xbox 360 Opening Kit (optional, as it contains these tools)
How to Open the Xbox 360 Outer Shell
First, we need to remove the outer plastic shell that conceals the inside of the system. This process has a few parts.
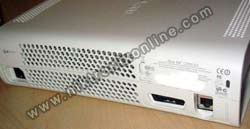
Step 1: Removing the Faceplate
To begin, you must start by removing the faceplate. Look at the front of the Xbox 360. Insert your thumb into the door that covers the two USB ports on the right side. With your other hand, squeeze the upper and lower sides of the faceplate. Then, pull the faceplate out with your thumb. It should pop right off without much force.

After you pull the faceplate off, you will see a silver Microsoft sticker covering a gap. You should remove this sticker. You will also see four small clips that lock the top half of the shell to the bottom half. However, do not try to pry these clips out yet.
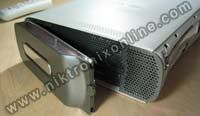
Step 2: Removing the Gray Ventilation Grills
Next, you will remove the gray ventilation grills on the sides of the console. Start with the right side (the side without the hard drive). Gently bend the gray plastic outwards so you can see inside a bit. You will notice that the gray side piece attaches to both the bottom and top white chassis. Now, look through the holes on top of the unit to find where the clips connect. You need to take your small, flat-head screwdriver and push down through the small holes to release these clips. While pushing the clips, slowly pull the gray piece away from the unit. Eventually, the gray piece will release.
To remove the left gray piece, you must first remove the hard drive. You can do this by pressing the release button on the hard drive unit itself. Then, use the same procedure as the right side. However, to reach the bottom clip on this side, you must first remove the rubber foot to reveal a hidden hole for your screwdriver.
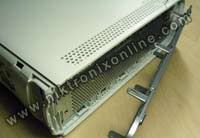
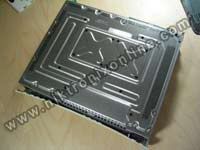
Step 3: Separating the Top and Bottom Shells
Once you have both gray side pieces removed, the main locking mechanism is gone. At this point, return to the front of the unit and turn it upside down. Using your flat-head screwdriver or wedge, gently pry up the clips holding the top shell to the bottom. When you insert the tool, you should hear a small click. While you unlatch the clips, you should also apply pressure to separate the case so they don’t re-clip. Once the front clips are unlatched, slowly lift the front of the bottom shell about an inch.
After that is complete, you may lift off the bottom shell covering.
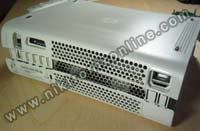
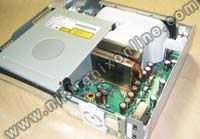
Step 2: Removing the Inner Metal Case to Open the Xbox 360
Now, when you look inside the unit, you will notice many screws. Specifically, there are 14 silver screws and 8 black screws. Using your T10 Torx screwdriver, remove only the silver screws. Six of these are long, so keep them separate. After you remove all the silver screws, you can lift off the other half of the shell. You should now see the internal parts of the Xbox 360.
Conclusion: Now That You Know How to Open an Xbox 360
In conclusion, learning **how to open an Xbox 360** (Phat) is the first step for any serious mod or repair. While it seems complex, it is manageable if you follow the steps and use the right tools. With the console open, you are now ready to begin your project.