Xbox 360 AXBY LED Mod: A Step-by-Step Guide
This guide will show you how to perform an Xbox 360 AXBY LED mod. This popular modification involves adding individual LED lights to the A, X, B, and Y buttons on your controller, making them glow. We will walk you through the entire process, from the parts you need to the final installation.
What You Will Need
First, before starting this project, you need to take apart your controller so you only have the main circuit board. If you do not know how, please check our guide on how to open the Xbox 360 controller. Once that is done, you will need the following items:
- Four 0603 SMDs
- 30 AWG Wire
- Solder
- A Soldering Iron
- A Hot Glue Gun
- The correct Resistors for your setup.
Step 1: Wiring SMDs for Your Xbox 360 AXBY LED Mod
Once you have all the materials and the controller is apart, it is time to begin. You will need to repeat this step four times, once for each button's SMD LED.
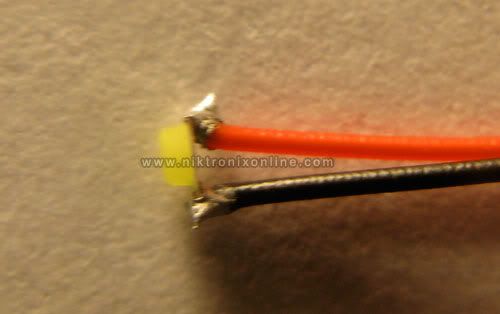
The only tricky part of this **Xbox 360 AXBY LED mod** is soldering the two wires to the tiny SMD. However, if you can do that, you are good to go. We will explain the best way to do it. First, "tin" your soldering iron by putting a little bit of solder on the tip. Then, pick up the SMD with tweezers and look at the bottom where the solder pads are. Briefly touch each pad with the soldering iron to apply a tiny bit of solder to each side of the LED. After you do this, get your 30 AWG wire and strip a very small amount of insulation off one end. Next, tin the stripped wire by applying a little solder to it. Do this for both wires you will attach to the SMD.
Now, get your SMD back in the tweezers and look at the pads you have 'tinned' already. You will need to touch the wire on the out side of the SMD and just heat the smd and the wire and there should be enough solder there to melt them together and make a good connection. It may not look pretty, but it will get the job done! Do this for both wires. It should look something like this:
Step 2: Placing the SMDs for Your Xbox 360 AXBY LED Mod
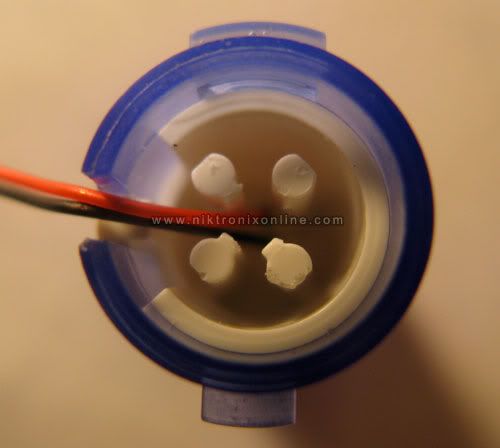
Now that you have your SMDs wired up, you need to put them into the buttons. You can fit the SMD into the button as shown in the picture. However, instead of running the wires out of the button's posts as shown, you should cut a small, new slot for the wires to go through. This will allow the button to press down without interference. You can make this slot with a Dremel or small wire cutters. You may also use a dab of hot glue just to hold the smd in place inside the button. Just use a tiny amount. Most importantly, do not let any glue get above the four posts, or the button will not press correctly.
Step 3: Powering Your Xbox 360 AXBY LED Mod
Next, you need to connect your newly wired buttons to a power source. You can find information on where to get power in the controller by reading our guide on Xbox 360 controller power points. It is critical that you choose the right resistors for your specific setup so you do not burn out your LEDs.
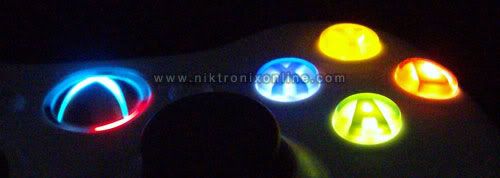
Finally, carefully put the controller back together. Make sure the wires are out of the way of any moving parts or screw holes. Then, test it! If you did it correctly, you will get something like this:
Conclusion
In conclusion, completing an **Xbox 360 AXBY LED mod** is a great way to customize your controller. Although soldering the tiny SMDs can be tricky, the final result is well worth the effort. By following these steps, you can add a unique, glowing flair to your controller buttons. Credits for the last image go to Jerry, one of our great customers!