Ring of Light Mod: Xbox 360 LED Swap Guide
This guide shows you how to perform a ring of light mod on your Xbox 360 controller. Specifically, you will learn to swap the original LEDs with new colored SMDs. This process, which people often call 'floating' the SMD off, requires careful soldering and precision. First, we will cover the tools you need. Then, we will explain how to remove the old lights and how to install the new ones.
Tools and Parts for Your Ring of Light Mod
To successfully complete this ring of light mod, you will need a few specific tools and parts:
- 20-30 Watt Soldering Iron (a 30 Watt iron is often preferred)
- Rosin Core 60/40 .40 Solder
- Soldering Stand (highly recommended for safety)
- Tweezers (these are essential for handling small SMDs)
- Four 0603 SMDs in your choice of color
- An Xbox 360 Controller
- If you don't know the polarity of your 0603 SMD, you should consult our Polarity Guide.
Removing the Original SMDs (Lights)
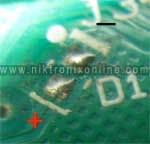
First, you need to remove the existing surface mount devices (SMDs) from your controller's Ring of Light. We use a method we call 'floating' the SMD off.
The "Floating" Method for SMD Removal
This method involves applying a good amount of solder to the tip of your iron. Then, you drag the hot iron across the edge of the SMD where its two solder points are. Your goal is to melt both connections at the same time. If you do not melt both, the SMD will not 'float off' cleanly. Also, do not apply too much pressure to the SMD with the iron; only a tiny bit is acceptable. Excessive pressure risks tearing up a solder pad on the board. Sometimes, adding a little bit of fresh solder to each end of the SMD before trying to 'float' it off can help a lot. Once you remove all four lights, you must make sure the soldering pads are clear of extra solder. You do not want mounds of solder on the pads, as this makes it hard to solder the new LEDs flat.


Installing New LEDs for Your Ring of Light Mod
After you remove all the original lights, you must install the new ones. Get out your purchased 0603 SMDs. You should remove only one SMD at a time; otherwise, you will most likely lose one due to its tiny size. When you have one removed, pick it up with your tweezers. Next, look closely to see which side is positive. Knowing the correct orientation is crucial for a successful **ring of light mod**.
Understanding Polarity for SMD Installation
You must position the SMD accordingly for installation, making sure it lies flat with the lens facing directly up. We will solder the positive side first. Therefore, add a little solder to the positive (+) pad on the board where you are going to solder first. Grab the negative side of the SMD with tweezers. Then, hold the positive side of the SMD just above the correct pad. Once you have it in the exact position you want, hold it tightly. Afterwards, melt the solder that you just added to the pad and gently push the SMD into the solder so it sticks. You should then remove the soldering iron and let the solder cool down and harden. Finally, remove the tweezers. It is important to remember that you should not apply heat to the board or the SMDs for very long, because too much heat can cause damage. You should only apply heat for a couple of seconds at a time at the most. Repeat this process for all four corners, and you are done with your **ring of light mod**!
Special Notes for CG Controllers
If you have a CG controller (please check our guide in the tutorials section for identification), blue and UV LEDs will look dim on a wireless controller. In fact, they may hardly show up at all. Other colors may also appear slightly dimmer than their maximum capacity. This happens due to a lack of voltage at these specific points in the controller. This issue is not related to the LEDs themselves but to the controller's design.
Conclusion on Your Xbox 360 Ring of Light Mod
In conclusion, completing a **ring of light mod** is a rewarding project that allows for unique customization. By carefully following these steps for removing old SMDs and installing new ones, you can personalize your controller's appearance. As a result, you can enjoy your newly customized Xbox 360 controller!