
XCM Controller Case Installation: A Guide for All Versions
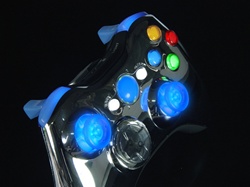
This guide provides directions for your XCM controller case installation. XCM makes several different versions of their custom Xbox 360 controller shells. It is very important to identify which version you have before you begin. Please read through this entire article first to avoid common mistakes.
Before You Begin: Common Pitfalls
Before starting your installation, it is helpful to be aware of a few things that can go wrong. For instance, you should pay close attention to the following issues:
- Using the wrong guide for your specific controller board version (Matrix vs. CG).
- Accidentally bridging solder points, which can cause shorts.
- "Trapping" buttons like the bumpers or sync button during reassembly.
- Allowing wires to get in the way of moving parts or buttons.
- Forgetting to put all buttons and rubber pads back into the shell before closing it.
Taking your time and being mindful of these points will help ensure your **XCM controller case installation** is a success.
Step 1: Identify Your XCM Case Version
First, you must find out which version of the XCM shell you have. There are two main types:
- Original 3-Wire Version: These are the older XCM cases. They have a simple wiring harness with only three wires.
- Newer 7-Wire Rapid Fire Version: These are the newer models that include an optional rapid-fire modification. They have a more complex harness with seven wires.
You must identify your version now to follow the correct guide below.
Step 2: Follow the Correct Installation Guide
After you have identified your case version, follow the appropriate set of directions.
For 3-Wire XCM Controller Cases
If you have an older 3-wire version, you will need to follow one of two different install guides. The correct guide depends on your specific controller's internal circuit board (Matrix or CG). Please select the guide that matches your controller board:
- XCM Matrix Controller Shell Installation Guide (3-Wire)
- XCM CG Controller Shell Installation Guide (3-Wire)
For 7-Wire Rapid Fire XCM Controller Cases
If you have a newer 7-wire version, you have another choice to make. You must decide if you want to install only the lights or if you want to install both the lights and the rapid-fire feature. The rapid-fire install is much more difficult, and we only recommend it for advanced modders.
IMPORTANT: If you are only installing the lights for your **XCM controller case installation**, you must follow these rules carefully:
- DO NOT solder any wires other than the black, red, and coffee-colored ones.
- DO NOT cut any traces on the circuit board.
If you cut traces but do not install the rapid-fire feature, your controller will not work properly. The only thing you need to do for a lights-only install is solder the three specified wires and reassemble the case. Also, if your version does not have light-up thumbsticks, you can simply skip that part of the guide.
Click the link below for the complete 7-wire installation manual:
Conclusion
In conclusion, a successful **XCM controller case installation** depends on correctly identifying your case version and following the right guide. Whether you have a 3-wire or 7-wire shell, taking your time and paying attention to the details will result in a great-looking custom controller. If you have any questions, please feel free to ask.